As I sit in my Emily Dickinson room, surrounded by vintage teapots and the warmth of a crackling fireplace, I often think about the countless hours I spent watching my father restore our old Victorian home’s deck. He would always say that learning how to set deck footings is an art that requires patience, dedication, and a deep understanding of the story you want your outdoor space to tell. I’ve seen many homeowners struggle with this process, overwhelmed by the numerous guides and tutorials that promise quick fixes but often lack the personal touch that makes a space truly special.
In this article, I promise to share with you my own experiences and practical advice on how to set deck footings, stripping away the confusion and focusing on the essential steps that will help you create a sturdy foundation for your dream deck. From choosing the right materials to navigating potential obstacles, I’ll guide you through the process with the same care and attention to detail that I bring to my own home styling projects. By the end of this journey, you’ll be equipped with the knowledge and confidence to transform your outdoor space into a cozy oasis that reflects your unique story and style.
Table of Contents
- Guide Overview: What You'll Need
- Step-by-Step Instructions
- Whispers of Deck Footings
- Setting the Stage for a Sturdy Oasis: 5 Essential Tips for Deck Footings
- Weaving a Lasting Impression: 3 Key Takeaways
- Setting the Stage for Enchanted Outdoor Spaces
- Weaving a Cozy Conclusion
- Frequently Asked Questions
Guide Overview: What You'll Need

Total Time: 4 hours 30 minutes
Estimated Cost: $100 – $300
Difficulty Level: Intermediate
Tools Required
- Post hole digger (for digging holes)
- Tamping tool (for compacting soil)
- Level (for ensuring footing is level)
- Drill (with concrete mix bit)
- Shovel (for mixing and pouring concrete)
Supplies & Materials
- Concrete mix (for setting footings)
- Sonotube or cardboard tube (for forming footing)
- 2-in x 6-in lumber (for footing forms)
- Concrete anchor bolts (for securing deck to footings)
- Gravel or compacted soil (for base material)
Step-by-Step Instructions
- 1. First, let’s start by preparing the site for our deck footings. This involves clearing the area of any debris, vegetation, or obstructions that could interfere with our construction process. I like to think of this step as setting the stage for our outdoor story, where every element, including the footings, will play a crucial role in the narrative of our deck.
- 2. Next, we need to determine the footing layout. This is where we decide on the placement and spacing of our footings, taking into account the size and design of our deck, as well as the local building codes and regulations. It’s a bit like choosing the characters for our story; each footing has a specific role to play in supporting the structure of our deck.
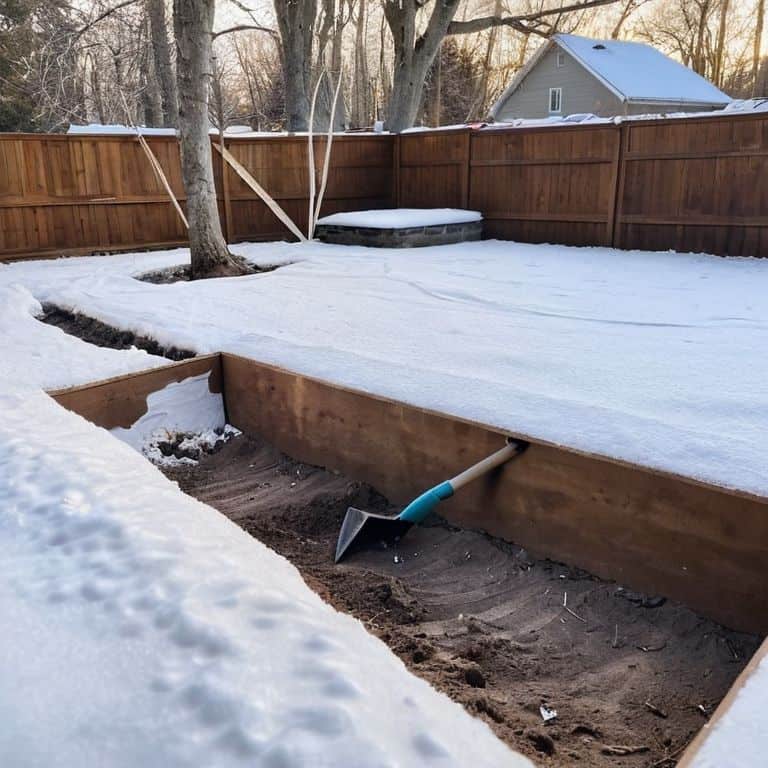
- 3. Now, let’s move on to digging the holes for our footings. This is where things can get a bit messy, but it’s also an exciting part of the process, as we start to see our deck take shape. I recommend using a post hole digger or a power auger to make the process easier and more efficient. As we dig, let’s remember that these footings will be the foundation of our deck, providing the necessary support for our outdoor oasis.
- 4. With our holes dug, it’s time to pour the concrete for our footings. This is a critical step, as the concrete needs to be mixed and poured correctly to ensure that our footings are strong and durable. I like to think of this step as adding the texture to our story, where the concrete provides a solid base for our deck’s narrative to unfold.
- 5. Once the concrete has been poured, we need to allow it to set and cure. This can take several hours, depending on the type of concrete we’re using and the weather conditions. During this time, let’s take a moment to envision our completed deck, with its beautifully crafted railings and inviting outdoor spaces. It’s a great opportunity to think about the story we want our deck to tell and how we can use lighting, furniture, and decor to bring that story to life.
- 6. After the concrete has cured, we can start installing the footings. This involves placing the footing tubes or forms into the holes and filling them with concrete. It’s a bit like weaving a tale, where each footing is a thread that helps to create a strong and sturdy narrative for our deck.
- 7. Finally, let’s finish and inspect our footings. This is where we make sure that everything is level, plumb, and secure, and that our footings are properly anchored to the ground. It’s the final chapter in our story of setting deck footings, and it’s essential to get it right to ensure that our deck is safe and enjoyable for years to come. As we complete this step, let’s take a moment to appreciate the attention to detail that has gone into creating a solid foundation for our outdoor oasis.
Whispers of Deck Footings
As I sit in my “Heathcliff” study, surrounded by vintage teapots and the warmth of a crackling fire, I ponder the nuances of creating a sturdy deck foundation. It’s essential to consider deck footing depth requirements, ensuring that your footings extend below the frost line to prevent shifting and damage. This is particularly crucial in areas with harsh winters, where the soil can freeze and expand, compromising the integrity of your deck.
When it comes to precast concrete footings for decks, I must say that I’m a fan of their convenience and efficiency. These pre-made footings can save you time and labor, while also providing a consistent and reliable base for your deck posts. However, it’s vital to follow the manufacturer’s instructions and local building codes to ensure a safe and durable installation.
As I delve into the world of deck foundation design, I’m reminded of the importance of frost protected shallow foundation methods. By using techniques such as insulation and drainage, you can create a foundation that’s resistant to frost damage and other environmental factors. This not only ensures the longevity of your deck but also provides peace of mind, allowing you to enjoy your outdoor oasis without worrying about its stability.
Frost Protected Shallow Foundations
As I sit in my “Heathcliff” study, surrounded by vintage teapots and the musty scent of old books, I ponder the magic of frost protected shallow foundations. These ingenious systems allow us to build decks with footings that are, quite literally, shallow – a mere 12-18 inches below grade. By insulating the soil beneath the footing, we can prevent frost from penetrating and causing damage, much like how a good story can transport us to a world where worries disappear.
This technique is particularly charming for those of us who live in areas with mild winters, as it enables us to create a sturdy foundation without having to dig deep into the earth. I envision a cozy deck, nestled among the trees, its foundation a testament to the power of clever design and a dash of whimsy.
Unveiling Precast Concrete Footings
As I sit in my “Elizabeth Bennet” morning room, surrounded by vintage teapots and the warm glow of natural light, I find myself pondering the elegant simplicity of precast concrete footings. These clever creations are like the trusted companions of our deck’s foundation, providing a sturdy base for our outdoor haven. With their consistent quality and ease of installation, precast concrete footings are a delightful option for those seeking a hassle-free experience.
In the world of deck footings, precast concrete is a charming solution, much like the perfectly brewed cup of tea from my favorite vintage teapot, “Lizzie.” It’s a thoughtful choice that allows us to focus on the beauty and wonder of our outdoor space, rather than the intricacies of its foundation.
Setting the Stage for a Sturdy Oasis: 5 Essential Tips for Deck Footings

- Let the ground be your guide: before you start digging, ensure you’ve checked the soil conditions and frost lines to determine the perfect depth for your deck footings
- Measure twice, dig once: double-check your calculations to avoid any costly mistakes, and remember that accuracy is key when it comes to creating a stable foundation
- Get creative with your materials: consider using precast concrete footings or frost-protected shallow foundations to add a touch of uniqueness to your deck’s base
- Call in the reinforcements: if you’re unsure about any aspect of the process, don’t hesitate to consult with a professional to ensure your deck footings are safe and secure
- Add a dash of whimsy: once your deck footings are in place, think about the overall aesthetic you want to achieve – will you be adding decorative railings, or perhaps a statement piece of outdoor furniture to bring the space to life?
Weaving a Lasting Impression: 3 Key Takeaways
Embracing the art of setting deck footings is not just about functionality, but about crafting a foundation that whispers stories of its own, where every carefully laid footing is a testament to the magic that happens when whimsy meets wonder
By exploring the enchanting realm of precast concrete footings and frost protected shallow foundations, we can unlock the secrets to creating outdoor oases that are as sturdy as they are captivating, inviting all who enter to surrender to their charm
As we conclude our journey through the realm of deck footings, remember that the true essence of home styling lies not in the technicalities, but in the emotional connections we forge with our spaces, and the tales they tell of love, laughter, and adventure that unfold beneath the gentle rustle of leaves and the warm glow of twinkling lights
Setting the Stage for Enchanted Outdoor Spaces
As we lay the foundations for our dream deck, remember that setting deck footings is not just about stability, but about crafting a story that begins beneath our feet, where every carefully placed footing is a promise of laughter, adventure, and memories yet to be made.
Margaret Silva
Weaving a Cozy Conclusion
As we conclude our journey through the realm of deck footings, let’s take a moment to breathe in the essence of our outdoor oasis. We’ve navigated the step-by-step process of setting deck footings, from the initial preparations to the final touches. We’ve also delved into the world of precast concrete footings and frost protected shallow foundations, uncovering the secrets to a sturdy and long-lasting deck. By embracing these techniques, you’ll be well on your way to creating a whimsical outdoor space that whispers tales of wonder and magic.
As you embark on your own deck-building adventure, remember that the true magic lies not in the footings themselves, but in the stories they will hold. The laughter of loved ones, the warmth of summer nights, and the cozy conversations shared beneath the stars – these are the things that will bring your deck to life. So, let us raise our tea cups (perhaps from my beloved vintage teapot collection) to the art of storytelling through spaces, and to the enchanting outdoor realms that await us, full of possibility and wonder.
Frequently Asked Questions
What is the recommended depth for deck footings in areas with freezing temperatures?
In frosty climes, I always advise my clients to dig those deck footings to a depth below the frost line, typically around 12-18 inches, to prevent shifting and damage. It’s a step that ensures our outdoor haven remains stable and charming, much like the steadfast heroes in my favorite literary tales.
How do I determine the correct spacing for deck footings to ensure stability and safety?
To determine the correct spacing for deck footings, I consider the deck’s size, material, and local building codes. A general rule of thumb is to space footings 8-12 feet apart, but it’s essential to consult with a professional or check local regulations for specific requirements, ensuring a stable and safe outdoor oasis.
Can I use precast concrete footings for a deck with a complex or irregular shape?
While precast concrete footings can be a fantastic option, they might not be the best fit for a deck with a complex or irregular shape. The uniformity of precast footings can make them tricky to adapt to unique layouts. However, with some creative planning and customization, it’s not entirely impossible – let’s explore some workarounds to make it work!