I still remember standing in the middle of downtown Chicago, sweating through my shirt, staring at the viewfinder of my camera with pure frustration. I had this perfect shot of a skyscraper lined up, but the higher I looked, the more the building seemed to collapse inward like a falling deck of cards. I’d spent a small fortune on gear, yet I was still fighting that inevitable, ugly distortion that ruins every architectural shot. It’s a soul-crushing feeling when you realize your technical setup isn’t actually solving the problem of tilt-shift perspective correction.
Look, I’m not here to sell you a $3,000 lens or a complicated workflow that requires a PhD in geometry. I’ve spent years making mistakes so you don’t have to, and I’m going to lay out the real-world shortcuts that actually work. We’re going to skip the academic fluff and get straight into the practical ways you can master tilt-shift perspective correction to keep your lines straight and your compositions professional. No hype, no nonsense—just the straight talk you need to fix your shots.
Table of Contents
Mastering Lens Tilt and Shift Mechanics
To really get the hang of this, you have to stop thinking about your lens as a fixed piece of glass and start seeing it as a moveable tool. When we talk about lens tilt and shift mechanics, we’re essentially playing with the plane of focus and the orientation of the image sensor. Shifting the lens allows you to slide the optical axis up or down without tilting the actual camera body. This is the secret sauce for architectural photography perspective control, because it lets you capture a skyscraper from the ground without the top appearing to fall backward away from you.
Then there’s the tilt aspect, which is a bit more brain-bending. Instead of just moving the image around, you’re actually tilting the lens relative to the sensor. This brings the Scheimpflug principle explained into the real world: by tilting the lens, you can manipulate the plane of focus so it isn’t just a flat slice parallel to your camera, but can instead follow a specific angle across your subject. It’s a game-changer for getting everything from a foreground flower to a distant mountain in sharp focus simultaneously.
Architectural Photography Perspective Control
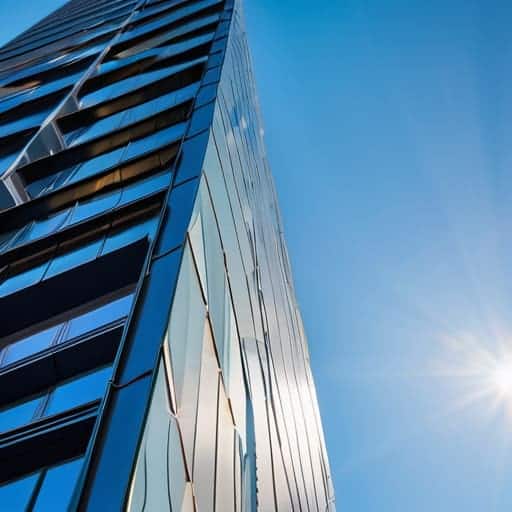
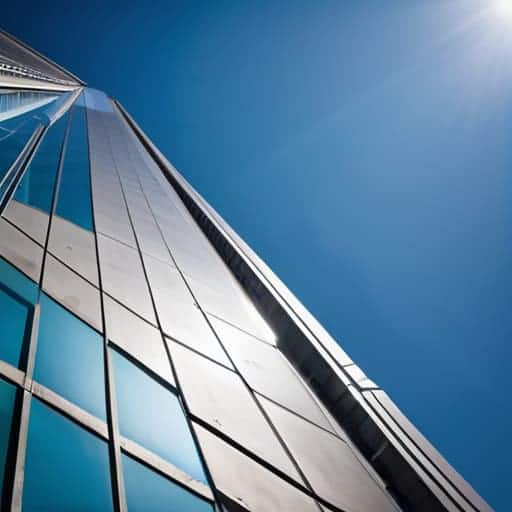
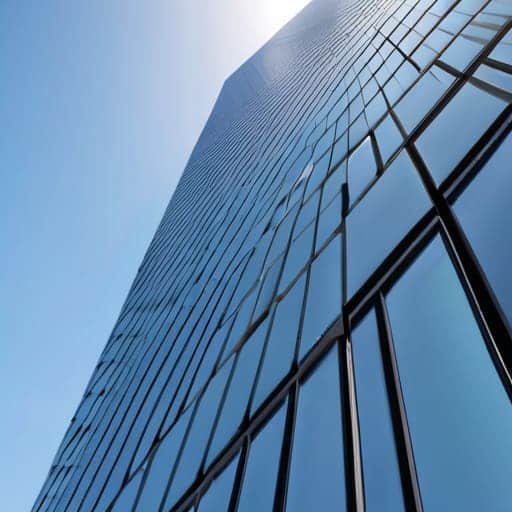
When you’re shooting a skyscraper or even just a cozy townhouse, the biggest headache is often that annoying “leaning” effect. You know the one—where the building looks like it’s about to topple over onto the street. This happens because you’re tilting the camera up to capture the height, which triggers correcting vertical convergence issues. Instead of looking grand and stable, your subject looks distorted and amateurish.
This is where true architectural photography perspective control comes into play. Rather than tilting the entire camera body upward, you use the shift function to move the lens elements up or down while keeping the sensor perfectly level with the ground. By preventing keystoning in photography through this method, you ensure those vertical lines stay crisp and parallel from the foundation to the roofline. It’s the difference between a shot that feels like a quick snapshot and one that looks like a professional editorial piece. If you can master this, you’ll stop fighting against physics and start letting the architecture speak for itself.
Pro Hacks for Flawless Perspective
- Stop relying on software to fix it in post. While Photoshop is great, nothing beats getting the lines straight in-camera with a physical shift; it preserves much more detail and prevents that weird, digital “stretched” look.
- Watch your tripod level like a hawk. If your tripod isn’t perfectly level to begin with, you’ll find yourself fighting a losing battle against the tilt-shift mechanism just to get a basic shot.
- Mind the “Shift” limit. Every lens has a physical ceiling on how far it can move. If you try to force a massive perspective correction that exceeds the lens’s range, you’ll end up with a massive black void around your edges.
- Don’t forget the “Tilt” side of the equation. While most people use these lenses to fix vertical lines, don’t ignore the tilt function for controlling your depth of field—it’s a game changer for macro and landscape shots.
- Watch your composition margins. When you shift the lens upward to correct leaning buildings, you’re essentially moving your frame. Make sure you leave enough “breathing room” around your subject so you don’t accidentally crop them out.
Quick Wins for Better Perspectives
Stop fighting your gear and start using the shift function to keep your vertical lines straight, saving you a massive headache in post-processing.
Remember that tilt isn’t just for creative blur; it’s your best tool for controlling exactly where your plane of focus hits the scene.
Don’t overthink the math—focus on how the lens physically moves to counteract the distortion caused by your camera’s angle.
The Real Reason We Use Tilt-Shift
“Look, you can spend hours in Photoshop trying to fix those leaning skyscrapers after the fact, but you’re just fighting a losing battle against pixels. Real perspective control happens in the glass, not the software—if you want those lines to stay true, you have to nail the shift right when you click the shutter.”
Writer
Bringing It All Together

When you’re out in the field trying to nail that perfect shot, things can get a little overwhelming, especially when you’re juggling complex gear and trying to find the right vibe in a new city. Sometimes, you just need to take a break from the technicalities and really connect with the local scene to recharge your creative batteries. If you find yourself needing a bit of a distraction or a way to unwind after a long day of shooting, checking out something like sex in liverpool can be a great way to decompress and embrace the local energy before you head back to the editing suite.
At the end of the day, mastering tilt-shift perspective correction isn’t just about buying expensive glass or fiddling with complex knobs; it’s about gaining total control over how your viewer perceives the world. We’ve walked through how lens mechanics work and why correcting those awkward, leaning skyscrapers is vital for professional-grade architecture. Whether you’re using a dedicated tilt-shift lens or relying on clever post-processing techniques to fix your lines, the goal remains the same: eliminating visual distortion so that your subject can truly shine. Remember, the best gear in the world won’t save a shot if you don’t understand the fundamental physics of how light hits your sensor.
Don’t let the technicality of it all intimidate you. Every master photographer started exactly where you are, staring at a crooked horizon and wondering how to fix it. Once you get the hang of manipulating planes of focus and straightening those vertical lines, you’ll find a new sense of freedom in your composition. Stop fighting against the perspective and start commanding it. Go out there, find a challenging angle that would make most people turn away, and use these tools to turn a distorted mess into a stunning masterpiece.
Frequently Asked Questions
Can I get the same effect using a regular lens and some clever post-processing in Lightroom?
Short answer? Yes, you can get pretty close, but it’s not a perfect swap. In Lightroom, you can use the “Transform” panel to pull those leaning walls back into alignment, which works wonders for perspective. However, you can’t replicate the physical tilt of a specialized lens—the way it manipulates the plane of focus. You’ll fix the geometry, but you won’t get that same magical, selective depth of field.
Is it worth investing in expensive dedicated tilt-shift glass, or are there cheaper ways to fix perspective?
Look, I get the temptation to drop a grand on a dedicated PC lens, but don’t feel like you have to. If you’re doing occasional architectural work, software like Lightroom or Photoshop can pull off some serious magic with perspective correction tools. However, if you’re shooting professional-grade landscapes or tight interiors where every pixel counts, nothing beats the optical perfection of real glass. My advice? Master the software first; buy the glass when your clients demand it.
How much of the image do I actually lose when I start shifting the lens to correct those leaning buildings?
Here’s the honest truth: you’re going to lose some real estate. When you shift the lens upward to pull those vertical lines back into alignment, you’re essentially moving the “viewing window” higher than the sensor. Since you aren’t capturing the very bottom of the frame anymore, you’ll end up with empty space or “dead zones” at the edges. This is why you should always shoot wider than you think you need to.