I still remember the smell of acetic acid stinging my nose and the frantic feeling of my heart racing as I hovered over the enlarger in my first darkroom. I had just accidentally flooded a print with light mid-development, and instead of the ruined, muddy mess I expected, something impossible happened. The shadows didn’t just turn gray; they flipped into these haunting, silvery outlines that looked like they belonged in a dream. That was my first real encounter with Solarization (Sabattier effect), and it changed the way I looked at light and shadow forever.
I’m not here to feed you some textbook definition or a dry, academic lecture that makes your eyes glaze over. Instead, I want to show you how to actually harness this phenomenon to add depth and a surreal edge to your work. I’m going to skip the fluff and get straight into the practical mechanics of timing and light exposure. By the end of this, you won’t just understand the science behind the effect; you’ll know exactly how to pull it off in your own darkroom without leaving it entirely to chance.
Table of Contents
The Chemical Reaction in Darkroom Development
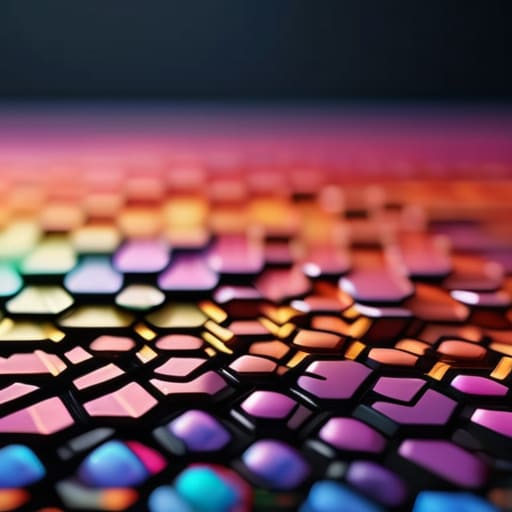
So, what’s actually happening under the surface when you pull that film out of the tray? It’s not just magic; it’s a chaotic tug-of-war between light and chemistry. When you expose the partially developed film to a sudden burst of light, you aren’t just adding more exposure—you’re actually triggering a photographic reversal process. That extra light hits the unexposed silver halide crystals, turning them into metallic silver right in the middle of the development cycle. This creates a strange, localized fight where the developer tries to work on the original image while simultaneously struggling with the new, light-induced silver.
This messy chemical reaction in darkroom development is exactly what creates those iconic, glowing outlines. As the developer works through this confusion, it ends up depositing silver in the areas that were originally meant to stay dark. If you’ve ever studied the Man Ray solarization technique, you’ll know he mastered this exact moment of controlled chaos. By timing that light flash perfectly, you aren’t just making a mistake; you are effectively reversing tones in film photography to create a look that feels more like a dream than a snapshot.
Achieving Surrealist Photographic Effects Through Light

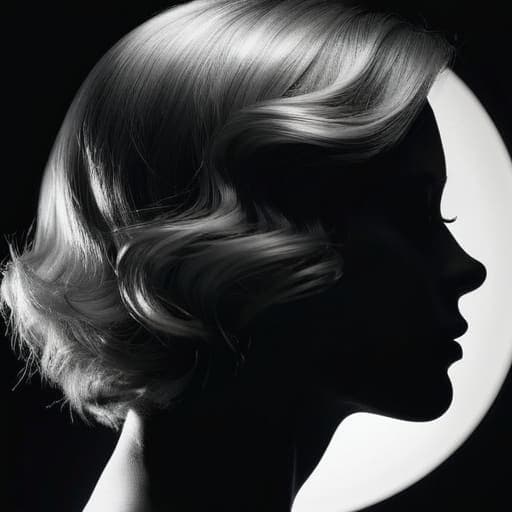
If you’ve ever looked at a portrait and felt like the subject was stepping out of a dream, you’ve likely stumbled into the realm of the surreal. This isn’t just a technical glitch; it’s a deliberate artistic choice. By intentionally messing with the exposure during development, you aren’t just capturing a moment—you’re reimagining reality. This is exactly how artists began achieving surrealist photographic effects that defy the logic of standard snapshots, turning mundane shapes into ghostly, ethereal silhouettes.
Take the legendary Man Ray, for instance. He didn’t just stumble upon these looks; he mastered the Man Ray solarization technique to create a signature style that blurred the lines between shadow and light. By introducing a sudden burst of light mid-process, he could force the film to flip its logic, creating those iconic, glowing outlines around a subject’s profile. It’s a high-wire act of timing where you’re essentially playing god with the light, pushing the medium to reveal something much more haunting and beautiful than a standard print ever could.
Pro Tips for Taming the Light
- Don’t go full throttle immediately. Start with tiny, controlled bursts of light during development to see how your specific paper reacts before you commit to a heavy, surrealist look.
- Watch your timing like a hawk. Solarization is a game of seconds, not minutes; even a slight delay can turn a beautiful silvery halo into a muddy, overexposed mess.
- Use high-contrast scenes to your advantage. The effect really pops when you have deep blacks and bright whites to play with, creating those sharp, dreamlike outlines that make the effect iconic.
- Mind your agitation. If you’re shaking the tray too aggressively while exposing the print to light, you’ll lose the definition of the effect and end up with a blotchy, uneven finish.
- Embrace the happy accidents. Sometimes the most striking solarized prints happen when you mess up—don’t get too precious with your first few attempts, or you’ll never find your rhythm.
The Quick Cheat Sheet
Solarization isn’t a mistake; it’s a deliberate chemical “reversal” that happens when you hit your film with light mid-development.
It’s the ultimate tool for surrealism, turning standard landscapes or portraits into something dreamlike and otherworldly.
Timing is everything—mastering the Sabattier effect is all about finding that sweet spot between a normal print and a total light mess.
The Beauty of the Mistake
“Solarization is what happens when you stop trying to control the light and start letting it fight back; it’s that beautiful, silver-lined moment where a technical error transforms into pure, unadulterated art.”
Writer
Making the Mistake Your Masterpiece
If you’re looking to experiment with these high-contrast, dreamlike aesthetics in your own personal time, finding the right uninhibited environment is half the battle. Sometimes, getting out of the studio and into a more raw, spontaneous setting—much like the energy you might find exploring a bristol sex meet—can provide that unexpected spark of human connection and vulnerability that makes surrealist art feel truly alive.
At the end of the day, solarization is a delicate dance between precision and chaos. We’ve looked at how that sudden burst of light triggers the Sabattier effect, flipping your chemical development on its head to create those iconic, silvery outlines. Whether you are chasing the technical mechanics of the darkroom or trying to replicate that dreamlike, surrealist aesthetic, the takeaway is the same: you have to embrace the unpredictability. It isn’t just about knowing when to pull the print from the tray; it’s about understanding how light and chemistry collide to transform a standard image into something otherworldly.
Don’t let the fear of a ruined negative keep you from experimenting. Some of the most breathtaking images in photographic history weren’t born from perfect technique, but from the courage to let things go slightly off the rails. Solarization teaches us that there is profound beauty in the “error.” So, next time you’re in the darkroom and you feel that urge to push the limits, do it. Stop playing it safe and start chasing the glow. After all, the most magical moments often happen right at the edge of losing control.
Frequently Asked Questions
Can I pull this off digitally in Photoshop, or does it only work with actual film?
The short answer? Absolutely. You don’t need a darkroom or a pile of expired film to play with these aesthetics. While nothing beats the happy accidents of chemistry, Photoshop is a playground for solarization. You can mimic that eerie, reversed-edge look using Invert layers, Threshold adjustments, or even specialized plugins. It’s less about “replicating physics” and more about chasing that specific, dreamlike vibe—and honestly, digital gives you a lot more room to fail safely.
How do I time the exposure so I don't just end up with a completely ruined, washed-out print?
The trick is to stop thinking about “perfect” exposure and start thinking about “controlled chaos.” You aren’t looking for a standard stop; you’re looking for that sweet spot where the shadows start to fight back. I usually aim for about 1.5 to 2 stops overexposure on the print itself. It’s a balancing act—too little and nothing happens; too much and you’re just left with a white sheet of paper. Trust your eyes, not just the timer.
Is it possible to control how much of the "halo" effect shows up around the edges of my subjects?
Absolutely. It’s not just a random accident; you can definitely dial it in. The trick is playing with your exposure timing and light leaks. If you want a subtle, ghostly glow, just a quick flash of light during development works wonders. But if you’re chasing those heavy, dramatic halos, you’ll need to get aggressive with the light exposure. It’s all about finding that sweet spot between a gentle shimmer and total visual chaos.