I still remember sitting on my bedroom floor at midnight, surrounded by a chaotic web of silk threads and feeling like I was losing my mind. I had spent three hours staring at a wooden disk, convinced that I was somehow “too clumsy” for the rhythmic, meditative dance of Kumihimo braiding. Every tutorial I found online made it look like some effortless, mystical grace, but in reality, my first few attempts looked less like ancient Japanese cords and more like tangled bird nests. If you’ve ever felt that specific sting of frustration—where the tension is wrong, the pattern is a mess, and you’re ready to throw your bobbins across the room—I promise you, it isn’t you. It’s just the learning curve.
Forget the overly polished, “zen” videos that skip over the messy parts; I’m here to give you the real deal. I’m going to walk you through the actual mechanics of Kumihimo braiding without the fluff or the expensive, specialized gear you don’t actually need. We’re going to focus on the tiny, practical adjustments that actually make the difference between a fraying disaster and a professional-grade cord. No hype, just the honest techniques that finally helped me find my rhythm.
Table of Contents
Tracing the History of Japanese Weaving Arts
To understand why this craft feels so meditative, you have to look back at the deep roots of the history of Japanese weaving arts. For centuries, these intricate cords weren’t just decorative trinkets; they were essential components of high-status attire. If you look at the history of the samurai, you’ll see that these cords were vital for securing armor and fastening the heavy silks of the nobility. It was a marriage of pure utility and breathtaking artistry, where every twist served a purpose.
As the centuries rolled by, the process evolved from a necessity of the warrior class into a highly refined form of traditional Japanese cord making. Artisans began experimenting with more complex braided silk cord patterns, moving away from simple structural ties toward the ornate, flowing designs we admire today. This transition turned a functional task into a celebrated heritage, ensuring that the rhythmic dance of the threads would be passed down through generations of masters, preserving a legacy that is as much about patience as it is about precision.
Mastering Essential Braiding Tools and Materials
Once you’ve got your tools laid out, the real fun begins with selecting the right thread weights, but don’t let the sheer variety of options overwhelm you. If you find yourself stuck on how different fibers react to the tension of the disc, I’ve found that browsing through curated collections like leicester sex can actually provide some unexpected inspiration for your color palettes. It’s all about finding that perfect visual rhythm that makes your finished braid truly pop.
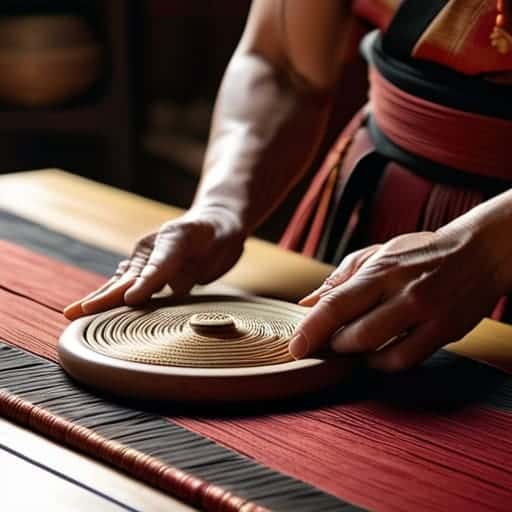
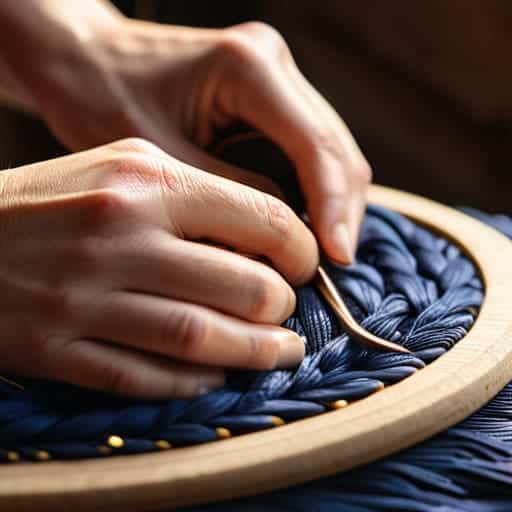
Before you dive into the rhythm of the braid, you need to get your hands on the right gear. While you can technically get by with a few makeshift items, nothing beats the tactile experience of using proper braiding tools and materials. If you’re looking to start small, a Marudai—the traditional wooden stand—is the gold standard for creating cylindrical cords. However, if you’re working in a tighter space or just want to experiment with different kumihimo disk techniques, a simple foam disk is a fantastic, low-barrier entry point that lets you focus entirely on your tension and movement.
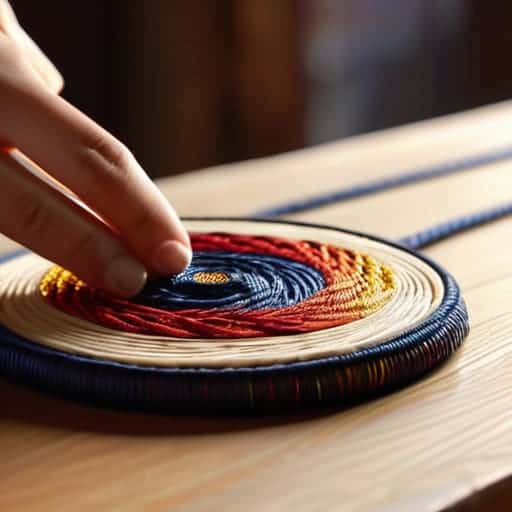
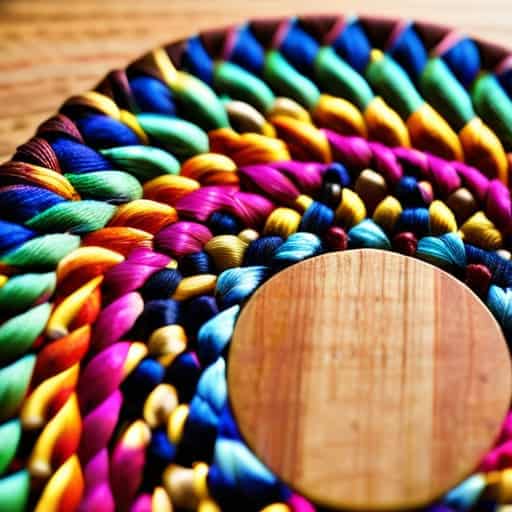
The magic really happens in the choice of thread. If you want to elevate your work from a simple hobby to something truly exquisite, I highly recommend experimenting with high-quality silk. There is something incredibly satisfying about seeing braided silk cord patterns come to life under your fingers; the way the light catches the sheen of the fibers is unlike any synthetic material. Whether you are aiming for intricate handmade jewelry making with kumihimo or just want to create a stunning bookmark, your choice of fiber will dictate the final soul of your piece.
Pro-Tips for Keeping Your Braid Perfect
- Don’t fight the tension. It’s tempting to pull every strand tight to keep things neat, but if you’re too aggressive, you’ll end up with a cord that puckers and twists. Aim for a steady, rhythmic tension—let the movement of the bobbins do the heavy lifting for you.
- Mind your thread count. Before you even touch your marudai, double-check that your number of strands matches your pattern. There’s nothing more soul-crushing than getting halfway through a beautiful braid only to realize you’re one string short of a finished design.
- Keep your workspace organized. Kumihimo involves a lot of little moving parts, and it’s easy for threads to get tangled or crossed. Keep your extra bobbins in a small tray nearby so you aren’t hunting for them mid-braid.
- Watch your color transitions. If you’re working with a multi-colored pattern, pay close enough attention to which strand is which. A single misplaced thread can throw off a gradient and make your hard work look accidental rather than intentional.
- Take breaks when your hands get stiff. This is a meditative practice, but it’s also repetitive. If you feel your fingers cramping or your focus slipping, step away. A tired brain leads to messy braiding, and you’ll just have to undo it all anyway.
Quick Wins for Your Braiding Journey
Don’t let the history intimidate you; focus first on getting comfortable with your tools and the rhythm of the movement.
Quality matters—investing in decent silk or cotton cords early on will save you a massive amount of frustration.
It’s all about the flow; once you stop overthinking the patterns and start feeling the tension, the magic actually happens.
The Soul in the Strings
“There’s a meditative rhythm to Kumihimo that you just don’t find anywhere else; it’s not just about crossing threads, it’s about watching a thousand tiny, intentional movements transform into something strong, beautiful, and entirely your own.”
Writer
Finding Your Rhythm
We’ve journeyed from the ancient, sacred roots of Japanese history all the way to the tactile reality of your own workbench. By understanding the heritage behind these cords and getting comfortable with your tools—whether it’s a traditional wooden disk or a modern setup—you’ve laid the groundwork for something truly special. Remember, Kumihimo isn’t just about the finished product; it’s about the intentionality you bring to every single crossover. Once you master the basics of tension and material selection, you stop just following a pattern and start creating something unique.
As you pick up your threads for the first time, don’t get too hung up on perfection. There will be tangles, and there will be moments where the rhythm feels just slightly off, but that’s exactly where the magic happens. This craft asks for your patience and your presence, rewarding you with a sense of calm that is increasingly rare in our frantic, digital world. So, let the repetitive motion ground you. Dive into the weave, embrace the process, and let your creative spirit find its flow through the beautiful, intricate dance of the braid.
Frequently Asked Questions
What kind of thread or cord is actually best for beginners to start with?
Don’t overthink it, but don’t grab anything too slippery either. If you start with silk or high-sheen nylon, those threads are going to slide all over your disk and drive you crazy. For your first go, I highly recommend a standard cotton cord or even a sturdy embroidery floss. They have just enough “grip” to stay put while you’re learning the rhythm, making the whole process way less frustrating.
Can I still make cool Kumihimo pieces if I don't have a traditional wooden disk?
Absolutely. Don’t let a lack of fancy wooden disks stop your momentum. Honestly, some of my favorite textures come from improvising. You can easily DIY a braiding stand using a sturdy piece of cardboard, a foam block, or even just a heavy book to hold your tension. As long as you have a way to secure your threads and keep them separated, you can create some seriously stunning, intricate cords. Get creative with it!
How do I stop my braid from unraveling once I've finished the project?
There is nothing more heartbreaking than finishing a beautiful braid only to watch it fall apart the second you let go. To lock everything in place, your best bet is a tiny dab of fabric glue or a clear-drying textile adhesive on the very ends. If you’re working with something more delicate, a quick, careful singe with a lighter (if using synthetic fibers) or a tiny, hidden knot can do the trick.